Manufacturing — how people actually build related hardware today
There is no mass-market factory for programmable matter. What exists today is a ladder of starter paths: makerspaces, university labs, small-batch PCB houses, 3D printers, and oligo synthesis services.
This page teaches how to begin building related machinery and kits — modules, connectors, electronics, educational molecular workflows — not how to industrialize self-assembling consumer products that do not exist yet.
The real ladder (idea → prototype → small batch)
Skip “scale to millions” fantasies until you can make ten reliable units.
Mechanical modules (3D print & laser-cut)
What beginners actually do:
- Design a brick/cube/tile in FreeCAD, Fusion, or Onshape.
- Add pockets for magnets, screws, or snap fits.
- Print in PLA/PETG on a school/makerspace FDM printer.
- Or laser-cut acrylic/plywood tiles for 2D capillary/magnet demos.
Tips that matter for self-assembly toys:
- Tolerance magnets carefully (press-fit vs glue).
- Chamfer edges so modules can slide into contact.
- Design polarity (N/S faces) into the CAD, not as an afterthought.
- Print a 1-unit test before a 20-unit batch.
Open starting points: modular robot papers’ supplementary CAD when released; classroom floatile repos such as FloaTiles ; your own Exp 7 modules from Experiments.
Connectors people use in labs
| Connector | Pros | Cons | Typical use |
|---|---|---|---|
| Permanent neodymium magnets | Cheap, passive | Pinch hazard; hard to undock | M-Block-like toys, tiles |
| Electro-permanent magnets | Controllable dock/undock | Drive electronics needed | SMORES-class research |
| Mechanical latches / hooks | Strong | Wear, alignment critical | Larger modular robots |
| Velcro / elastomer friction | Safe classroom | Low precision | Soft demos |
| Capillary / wetting patches | No electronics | Wet mess; scale limits | Floatiles |
Electronics path (Arduino / ESP32)
Most student swarm prototypes are “a brain + radios/IR + motors + battery” repeated N times.
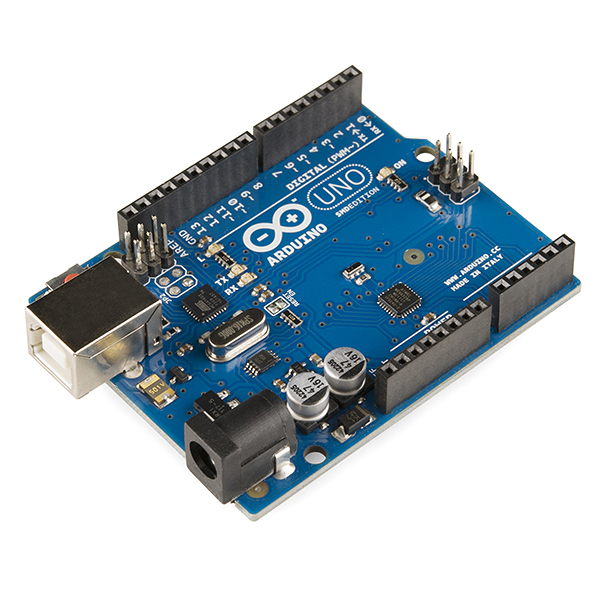
Typical student stack:
- MCU: Arduino Uno/Nano, ESP32, or STM32 Nucleo
- Motion: vibration motors, small DC gearmotors, or servos
- Sensing: IR reflectance, ToF, bump switches, IMU
- Comms: UART daisy-chain, ESP-NOW, BLE, or IR like Kilobots
- Power: LiPo with proper charging protection (makerspace supervision)
Firmware pattern: sense neighbors → apply local rule → actuate. Keep the rule short enough to explain on one sticky note.
PCB fabrication (small batch, not a fab)
You do not etch boards at home for serious revision control. Students usually:
- Draw schematic + PCB in KiCad (free).
- Export Gerbers.
- Order from a prototype house (examples people actually use: JLCPCB, PCBWay, OSH Park).
- Optionally order PCBA (assembly) for a few boards when the BOM is simple.
Watch a real factory tour to calibrate expectations (this is how boards are made, not a programmable-matter plant):
Source: Strange Parts — Inside a Huge PCB Factory (JLCPCB tour context).
Cost realism (order-of-magnitude, 2020s hobbyist): bare 2-layer boards often a few dollars each at quantity 5–10; assembled boards cost more once parts + stencil + labor are included.
Kilobot & open modular lineages
- Kilobots — designed for automated assembly and low cost per unit for research swarms. Academic/commercial kit availability changes over time; check Harvard SSR Kilobots page and educational vendors. Many learners start with simulators first.
- M-Blocks / SMORES / other MRR — research hardware; learn from papers and lab pages (SMORES-EP , MIT M-Blocks videos) rather than expecting Amazon kits.
- DIY vibration robots — feasible makerspace project inspired by Kilobot locomotion (not a clone of the research platform).
Molecular work: DNA as a service
You generally do not synthesize DNA oligos yourself as a beginner.
- Design sequences (paper, cadnano, or lab software).
- Order oligos / gene fragments from vendors (commonly cited educational/research vendors include IDT, Twist, etc.).
- Fold / anneal in a supervised wet lab with buffers, thermal cycler, and gel/AFM access.
- Image via university core facilities.
Home “DNA origami kits” that promise kitchen nanotech should be treated with extreme skepticism. See Supply chain for educational reagent boundaries.
Safety & cost realism
| Topic | Reality check |
|---|---|
| Magnets | Pinch injuries; keep > strong magnets away from implants |
| LiPo batteries | Fire risk if punctured/overcharged — use proper chargers |
| Laser cutters / CNC | Training required; ventilation matters |
| DNA / enzymes | Institutional biosafety rules; not a bedroom project |
| Budget for 10 magnetic modules | Often tens to low hundreds of USD in parts |
| Budget for 50+ electronic modules | Quickly thousands once PCBs, batteries, and labor count |
| Budget for DNA origami experiment | Dominated by oligos + lab access + imaging time |
Try this (manufacturing mini-plan)
Write a one-page plan for a 5-module magnetic tile system:
- Sketch faces and polarity.
- List print settings + magnet size.
- Estimate cost from Supply chain vendors.
- Define a pass/fail test (“forms a chain of 5 within 60 s of agitation”).
Next
→ Supply chain for BOM thinking · or return to Beginners